Página não traduzida
Esta página ainda não está disponível em português. O conteúdo é apresentado em inglês.
Cameras
Add a camera
-
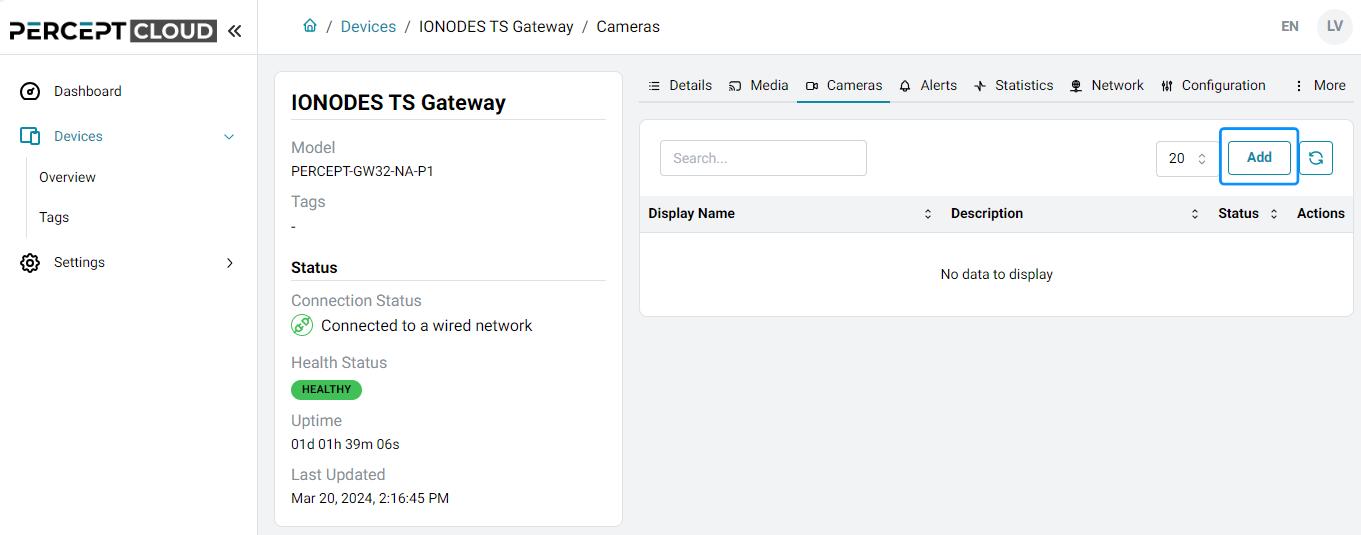
Open the Gateway's device profile, select Cameras, and click Add.
-
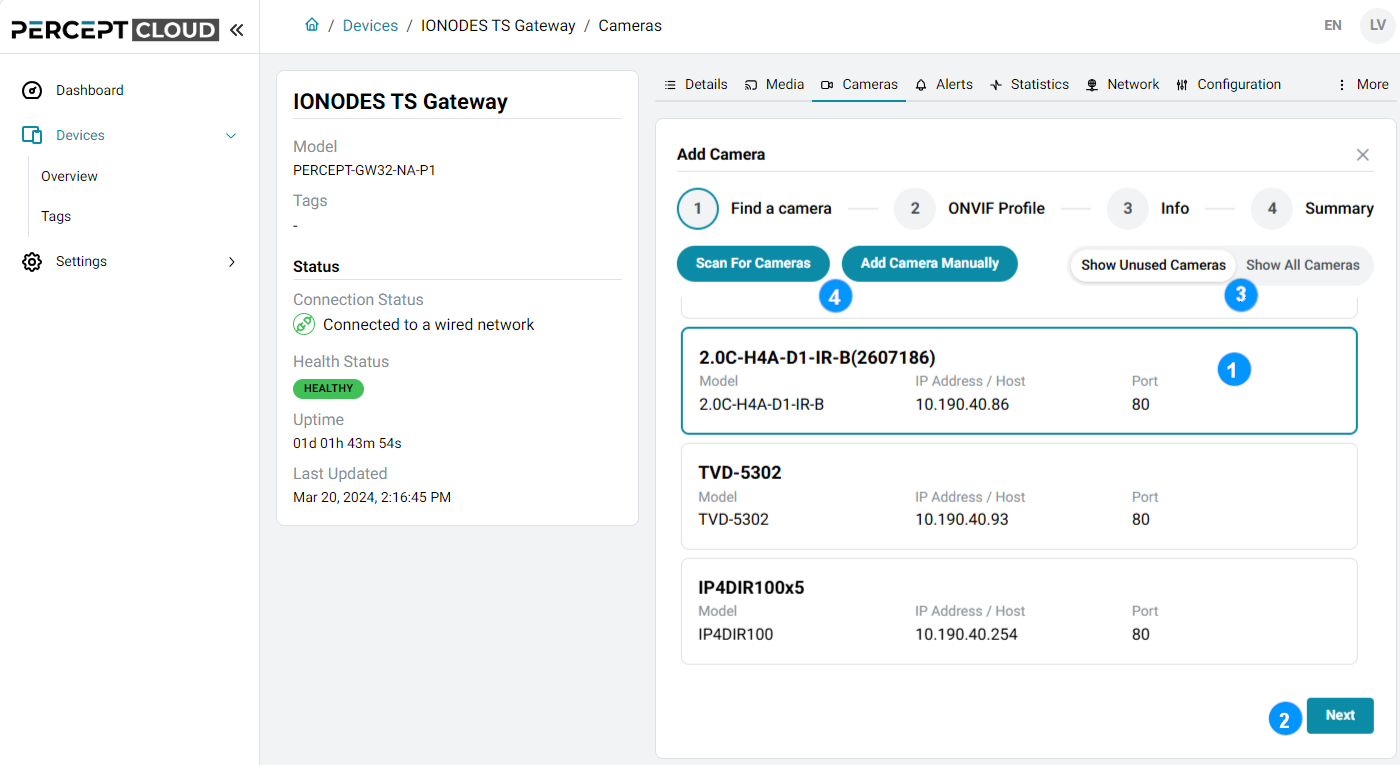
Select a camera from the discovery list and click Next. To add an ONVIF camera with discovery disabled, use Add Camera Manually and enter its IP address.
-
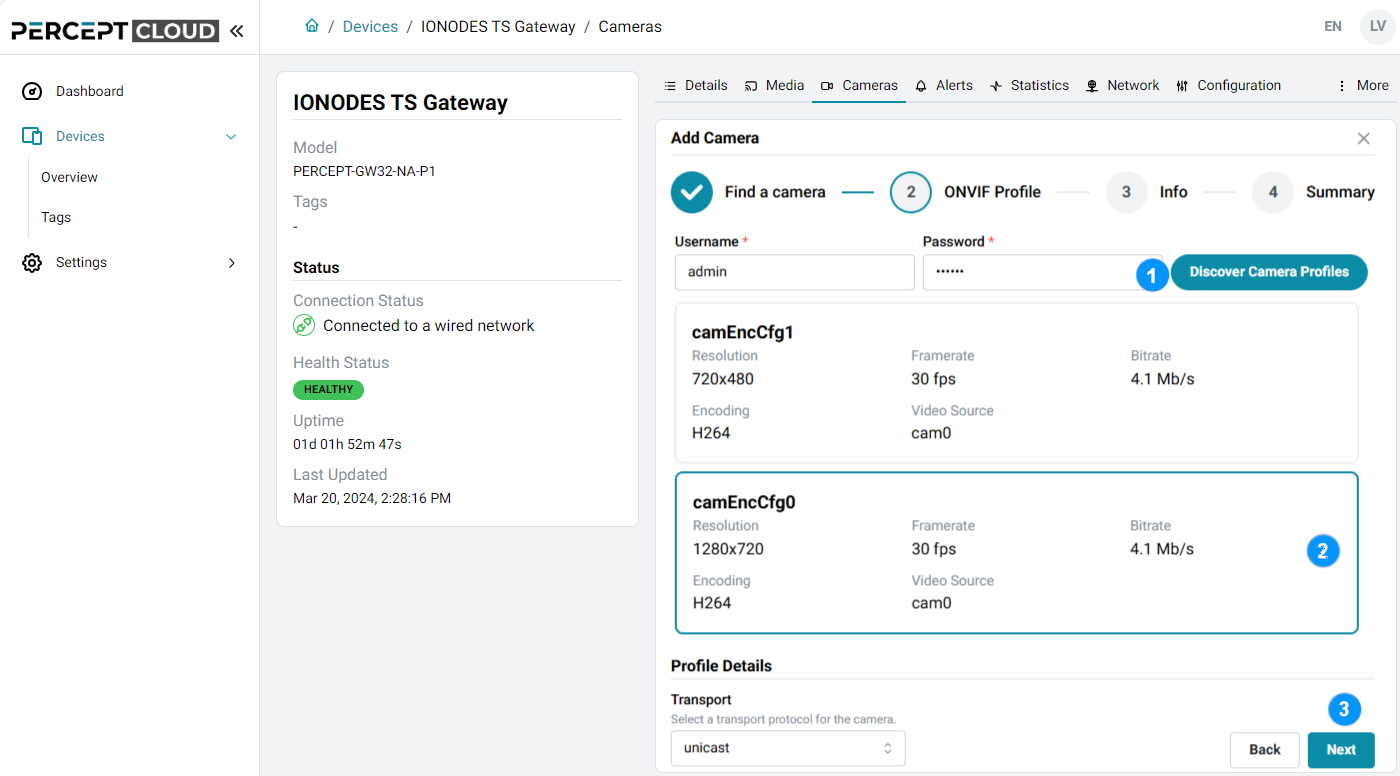
Enter valid ONVIF user credentials and click Discover Camera Profiles.
-
Select an ONVIF media profile and click Next.
-
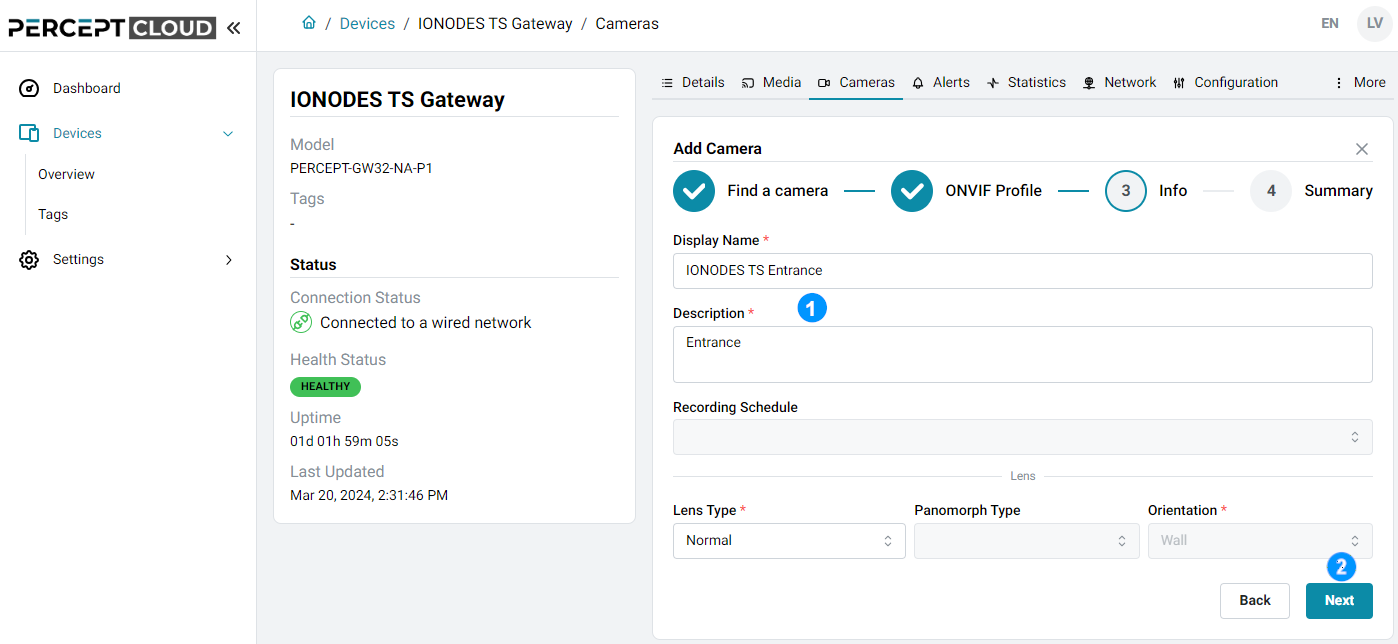
Enter a Display Name and Description, then click Next.
-
Review the Summary tab and click Done to add the camera. Use Back to change the settings.
The discovery list shows ONVIF-compatible devices available through the Gateway's network interfaces. Cameras already added are hidden by default; change the filter to include them or click Scan For Cameras to scan again.
Nota
PERCEPT Gateway Solution supports H.264 video only. Only profiles using H.264 are listed.
Nota
For real-time viewing over the internet, the recommended profile settings are a maximum resolution of 1080p, a frame rate of 10 fps, and a bitrate of 2 Mbps.
Camera profile
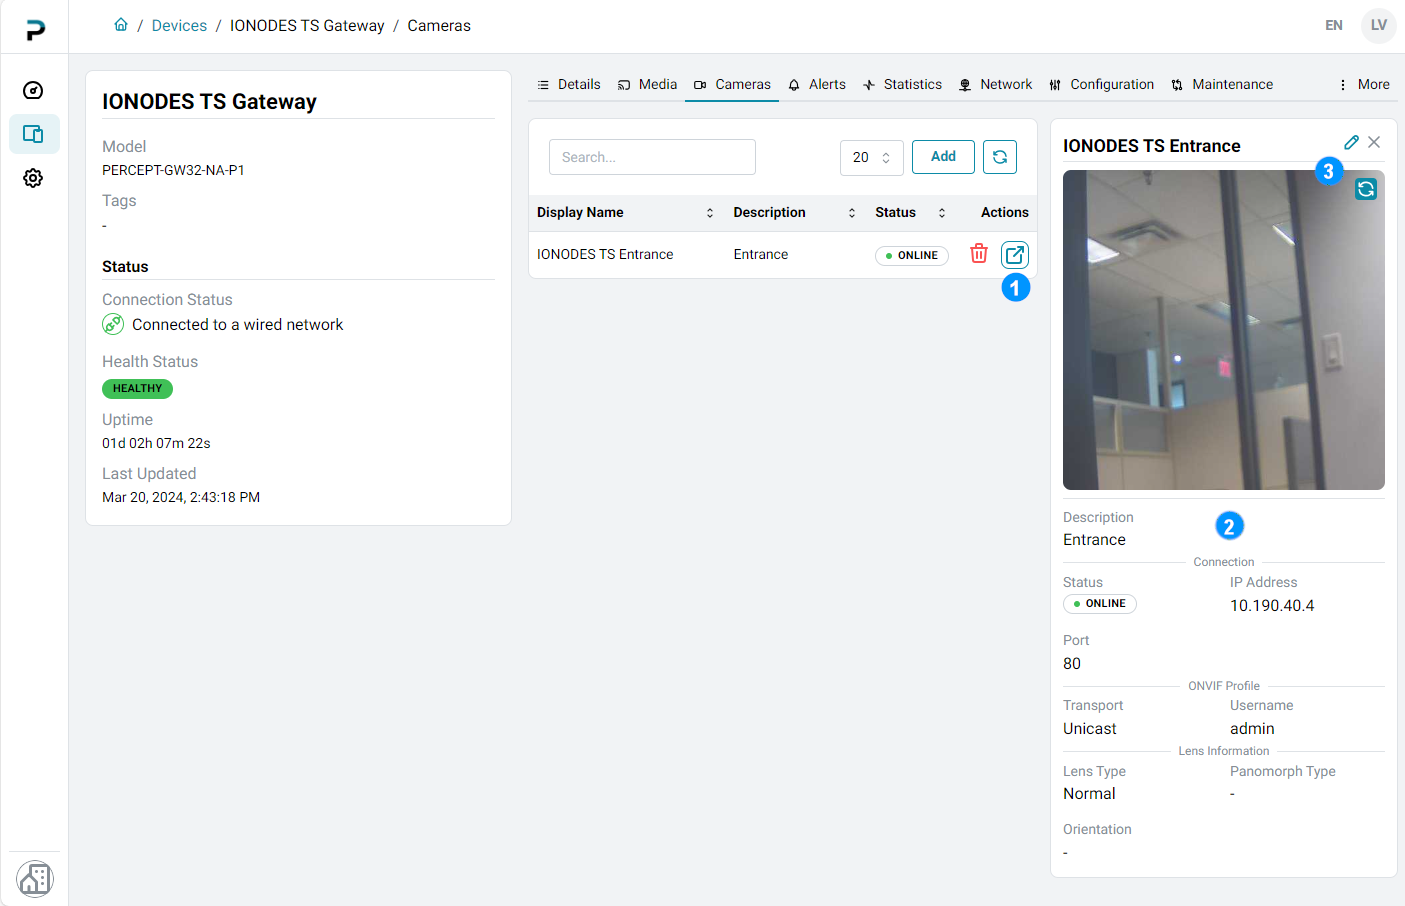
- Click Open Camera Profile for a camera to view its information and preview snapshot.
- Use the icon buttons to refresh the snapshot, edit camera information, or close the profile.
Nota
Preview snapshots are available only for cameras that support snapshots over ONVIF.