Page non traduite
Cette page n'est pas encore disponible en français. Le contenu est affiché en anglais.
Network
Before the PERCEPT Gateway can be used on your video network, it must undergo an initial setup step during which its network configuration is determined. This initial configuration setup is required for the PERCEPT Gateway to communicate with cameras on the network.
Although not recommended, the initial network configuration can be performed directly on the device by connecting a keyboard and a mouse, or it can be performed remotely from a computer or laptop connected to the same network. The recommended approach is to configure the PERCEPT Gateway from PERCEPT Cloud.
Network Configuration Basics
By default, all network interfaces of the PERCEPT Gateway are configured in DHCP mode (Dynamic Host Configuration Protocol). In DHCP mode, when the device connects to a network, it scans that network for a DHCP server. If a DHCP server responds, the device requests that the DHCP server provide a unique network address and associated settings. The device then uses the DHCP-provided network configuration to communicate with computers and cameras on the network.
If no DHCP server responds, the device switches to APIPA mode (Automatic Private IP Addressing). In this mode, the device automatically assigns itself a unique network address in the range 169.254.0.1 to 169.254.255.254 with subnet mask 255.255.0.0. APIPA mode ensures that devices in the APIPA network address range can communicate with one another.
If computers and cameras on your network are not configured in APIPA mode, the PERCEPT Gateway will not be able to communicate with them while in APIPA mode. In such a case, the network configuration of the device must be set manually.
When the network configuration is set manually, the PERCEPT Gateway skips the steps above and takes the user-provided configuration. It is then the responsibility of the user to ensure that the network configuration in the PERCEPT Gateway is compatible with the cameras on the network.
If local interfaces are unavailable at power up and temporary wireless recovery is needed, see the Access Point Mode fallback instructions in Initial Setup.
Setting Up Initial Network Configuration Locally
This section assumes the first login is complete and the administrator account is already configured. For the first-login workflow, see Initial Setup.
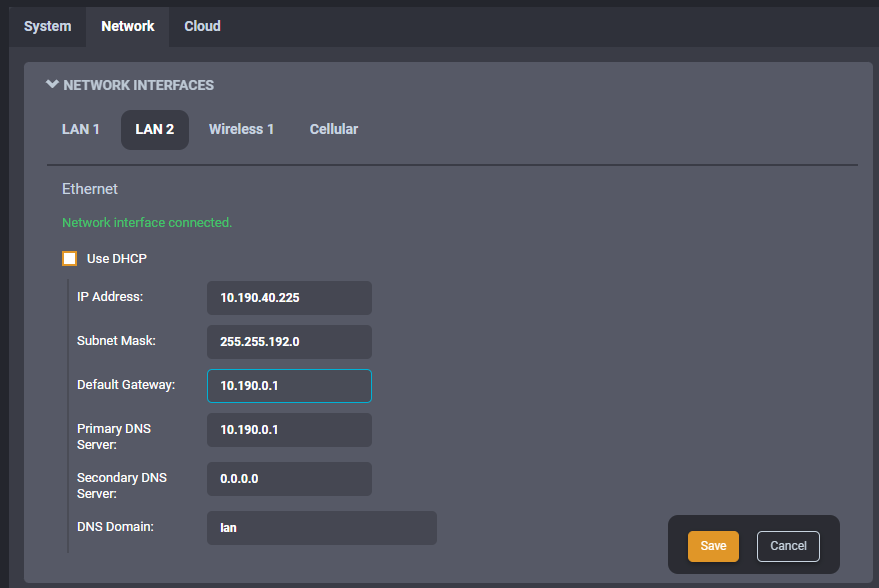
Ethernet network configuration is shown in sections LAN 1 and LAN 2. The first information displayed is the connection status of the Ethernet cable. By default, the PERCEPT Gateway is configured in DHCP mode. If a DHCP server is present on the network, the network configuration provided by the DHCP server is displayed. In that case, nothing needs to be done; the device is ready to communicate with other devices on your network.
If the IP address shown is in the range 169.254.., this means that the device could not obtain its network configuration from a DHCP server. In that case, the network configuration must likely be set manually.
To set the network configuration manually, uncheck Use DHCP. You can then enter static network settings. If you are unsure what values to enter, ask your network administrator to provide configuration settings compatible with your network. At a minimum, a valid IP address and Subnet mask must be entered. Once this is done, click on Save at the bottom to apply the configuration changes.
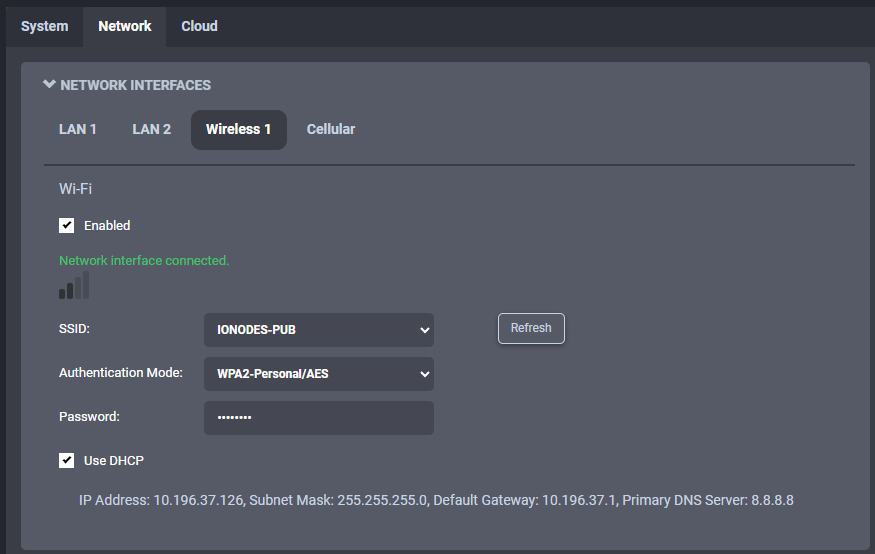
The PERCEPT Gateway is also equipped with a Wireless network adapter. In addition to the DHCP / Static IP selection and settings, the Wireless 1 interface requires the network's SSID, Authentication Mode and Password. Unlike the LAN interfaces, the Wireless 1 interface can be disabled.
The Cellular interface has no configurable parameter. The SIM card and network settings are automatically detected, and the cellular network enables itself when all other interfaces fail to access PERCEPT Cloud.
Configuring Wi-Fi Connectivity (optional)
Note
Start at section 12.1 for steps to connect to the PERCEPT Gateway management interface.
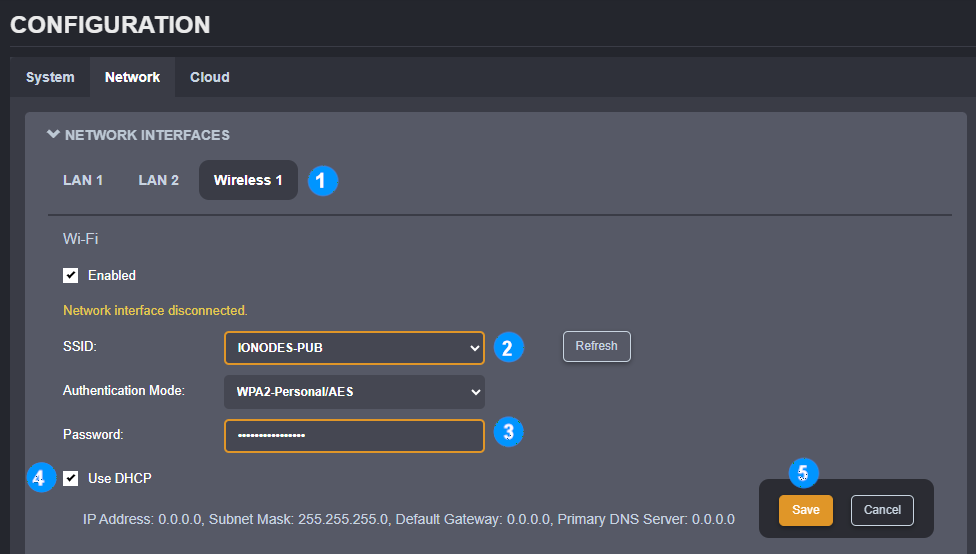
- From the Network Interfaces section, select the Wireless 1 button.
- Select the desired wireless network SSID from the drop-down menu list. Clicking the Refresh button will force a rescan of available SSIDs within range.
- Enter the Password for this SSID.
- By default, the wireless network is configured to use DHCP. To use static IP instead, uncheck this box and enter the static IP settings.
- Click Save
Changing network settings restarts the PERCEPT Gateway's web services. This forces a logout of the management interface. Re-enter credentials to log back in if needed.
Configuring Cellular Data
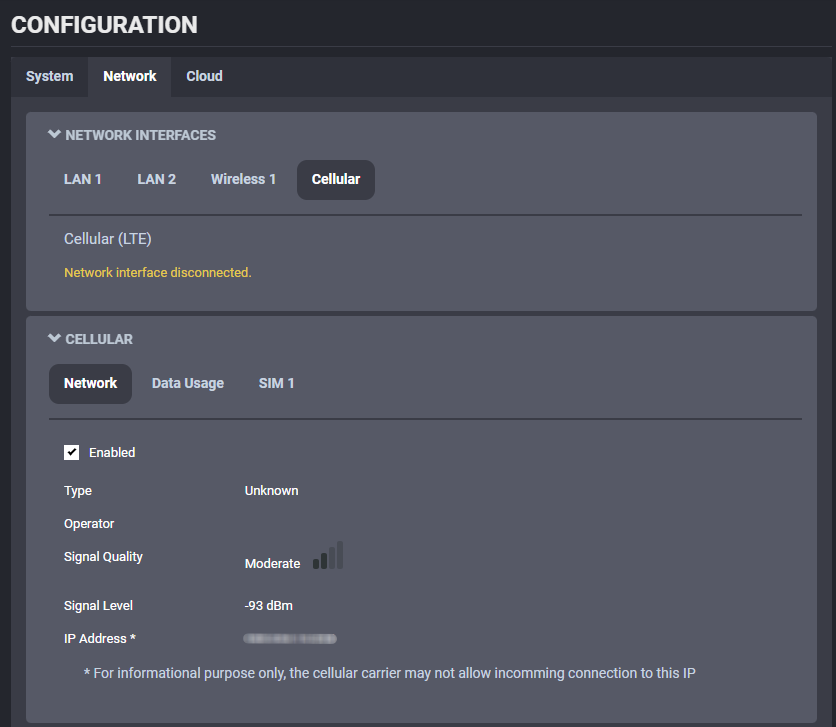
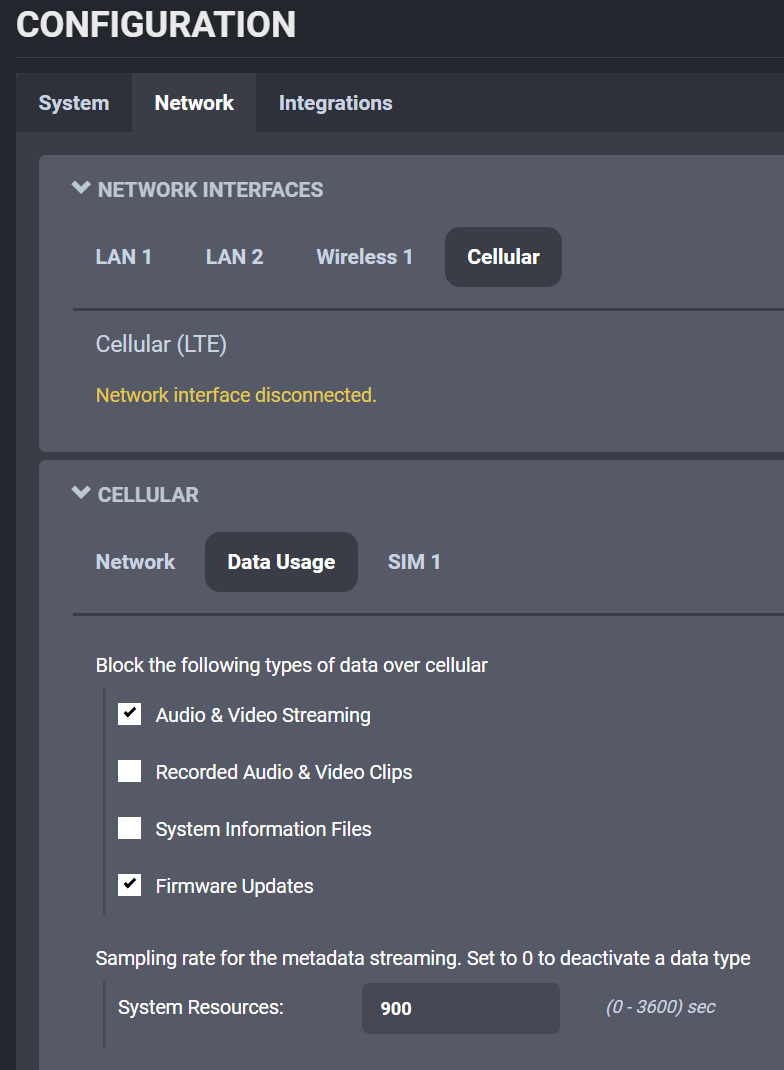
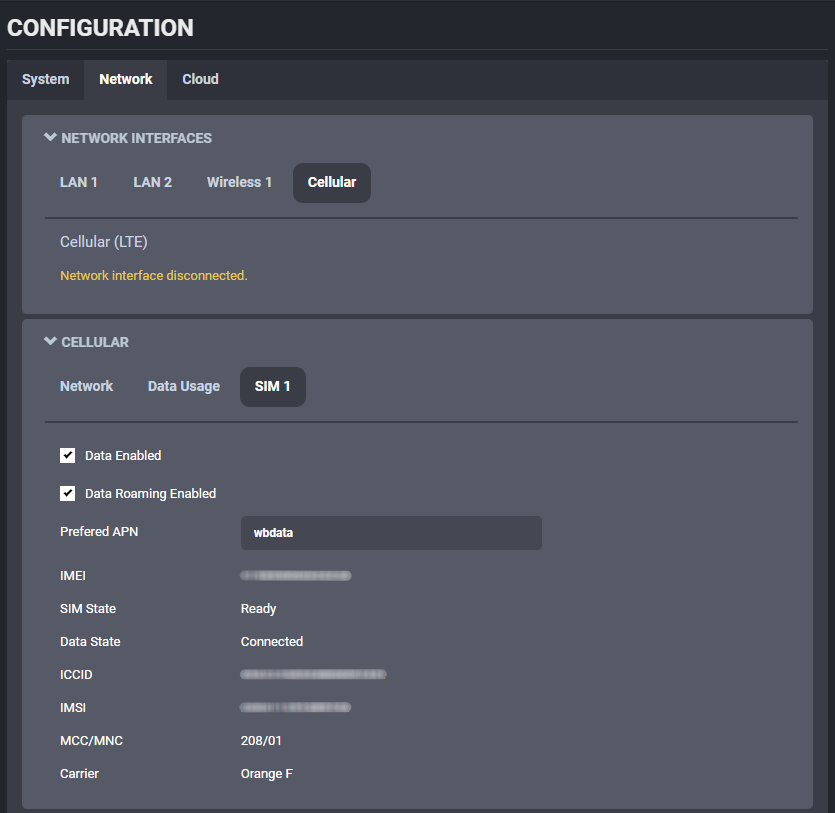
In the Configuration page, select the Network tab and go down to the section Cellular. The following subtabs provide access to cellular configuration.
- Network - The connection can be disabled if needed. Various health checkpoints are displayed to monitor the quality and status of the cellular link, including its associated IP address.
- Data Usage - Configure the type of data that is allowed over the cellular network, such as live audio & video, recorded clips, system information files or firmware updates. Note that checkboxes indicate blocked data types. For metadata streaming (GPS or system health / resources usage) the frequency of the updates is also user configurable.
- SIM 1 -- Provides information on the SIM card installed in your PERCEPT Gateway. You can enable or disable mobile data if needed, as well as add or select the APN provided by your network operator if using your own SIM card. Different status points such as SIM presence and Data connectivity are provided for monitoring.
Hostname
The Host Name field displays the device hostname. This value is read-only and cannot be edited.
Avertissement
The following settings are intended for advanced users. Changing them may affect device operation.
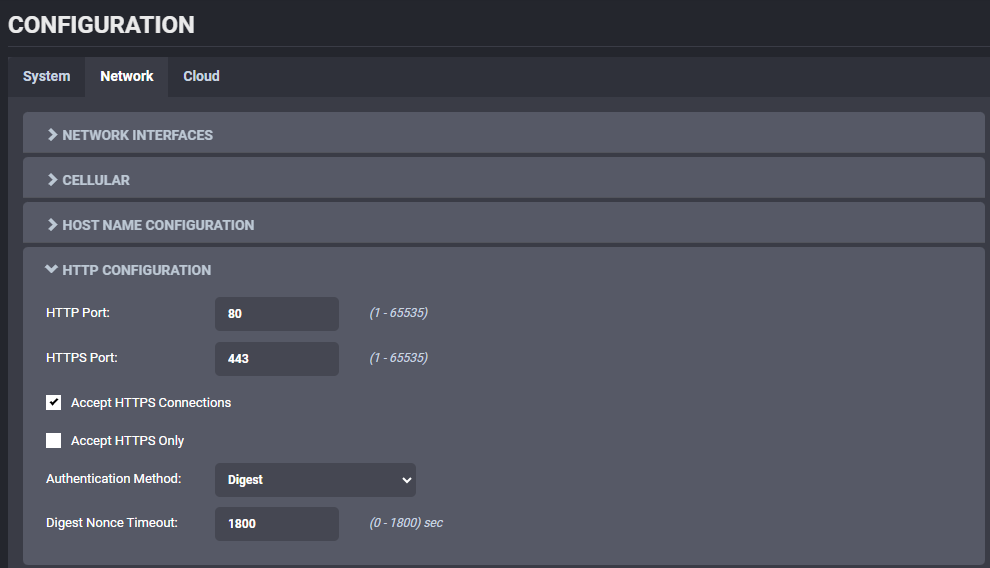
HTTP Configuration
This section details the parameters of the HTTP web server that hosts the configuration page and the command-and-control interface. You can configure HTTP/HTTPS ports and authentication methods.
Discovery
When discovery is enabled, the PERCEPT Gateway broadcasts discovery messages over the Bonjour protocol. This makes it discoverable by IONODES IonConfigTool utility.
Note
By default, the device responds only to discovery requests from the IONODES domain.

RTSP Configuration
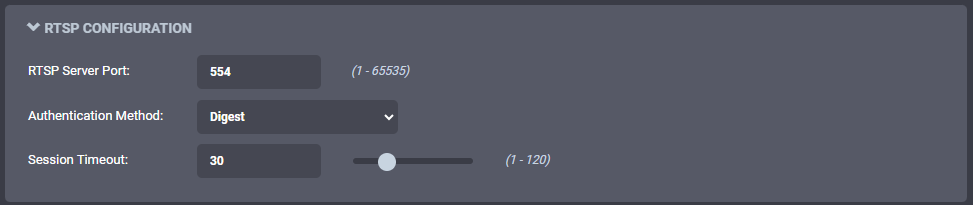
The PERCEPT Gateway hosts an RTSP server that can restream connected cameras on the local network. If the number of connected client applications on the network exceeds the number of individual streams supported by cameras, additional applications can access camera streams from the PERCEPT Gateway's RTSP server. Configurable parameters of this RTSP server are accessible in this section: port, authentication method and session timeout.
Multicast
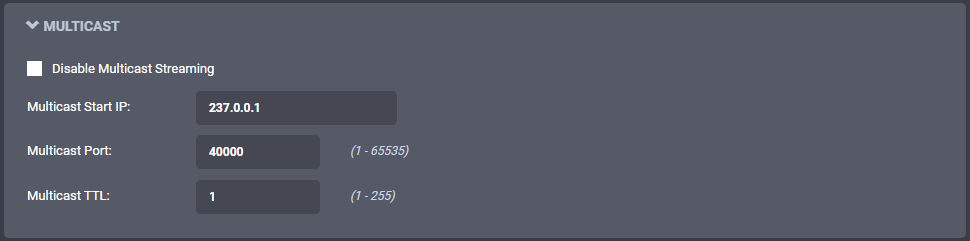
The RTSP server can stream locally over UDP Multicast. This subsection allows setting Multicast start IP, port and time-to-live.