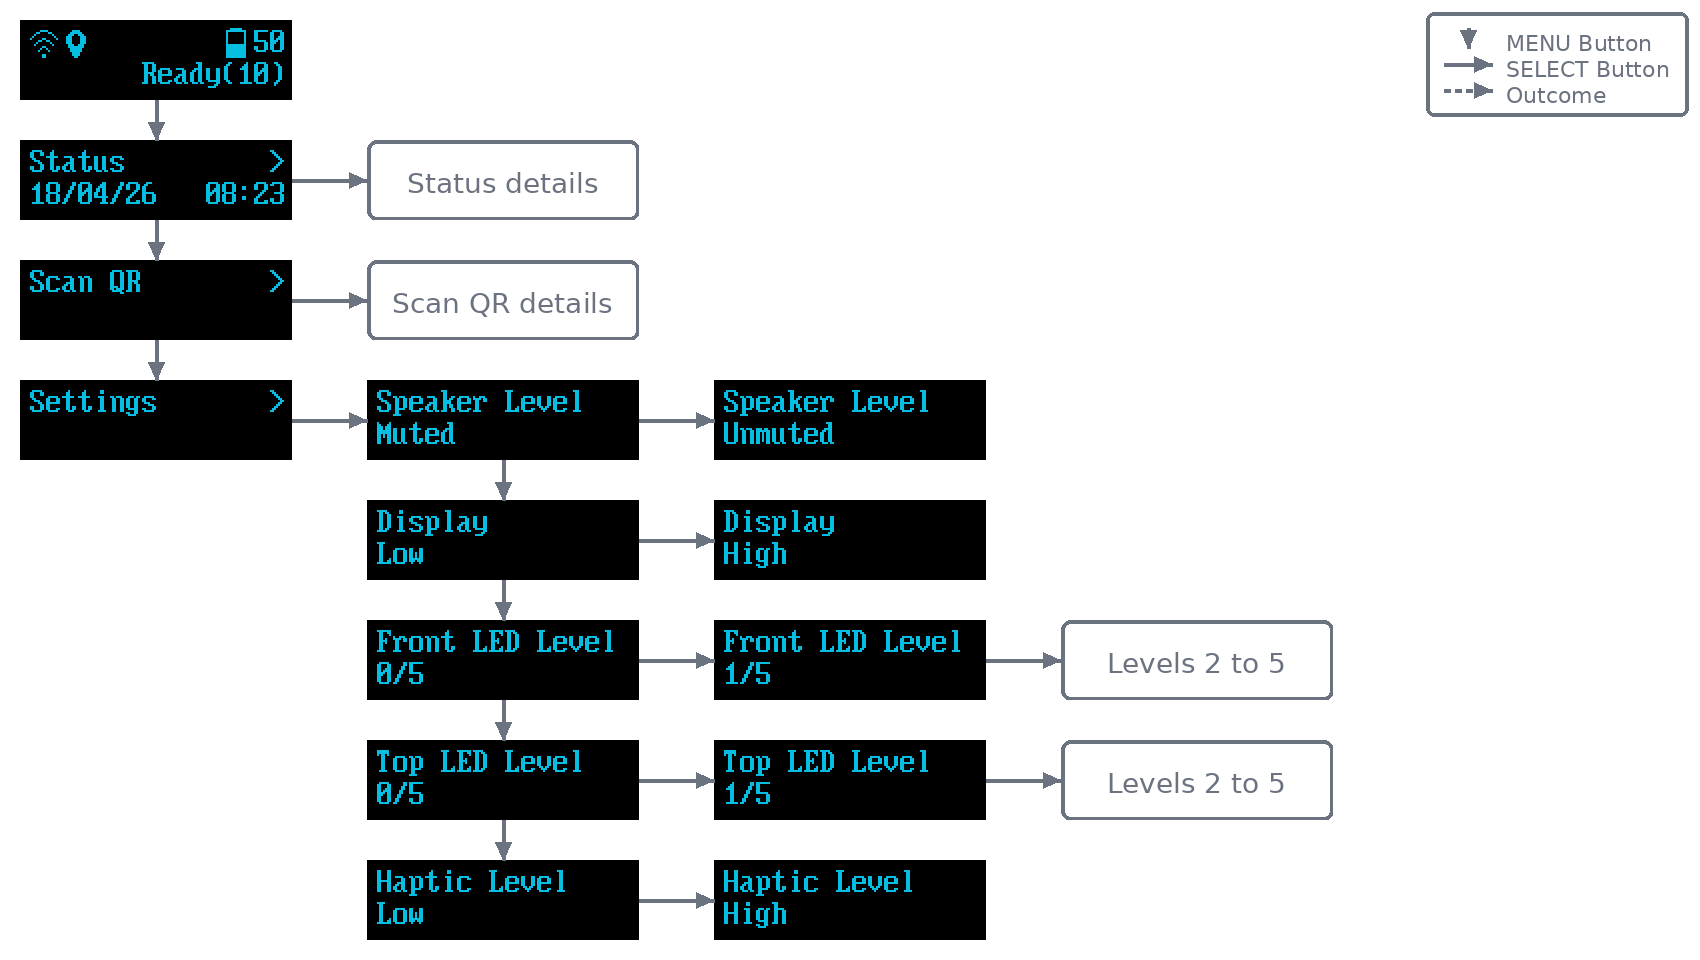
Menu
Overview of the body camera menu system and available submenus.
The camera menus are navigated using the MENU, SELECT, FUNCTION, and POWER buttons.
Note
Grey boxes indicate submenus or workflows that are expanded in the following sections.
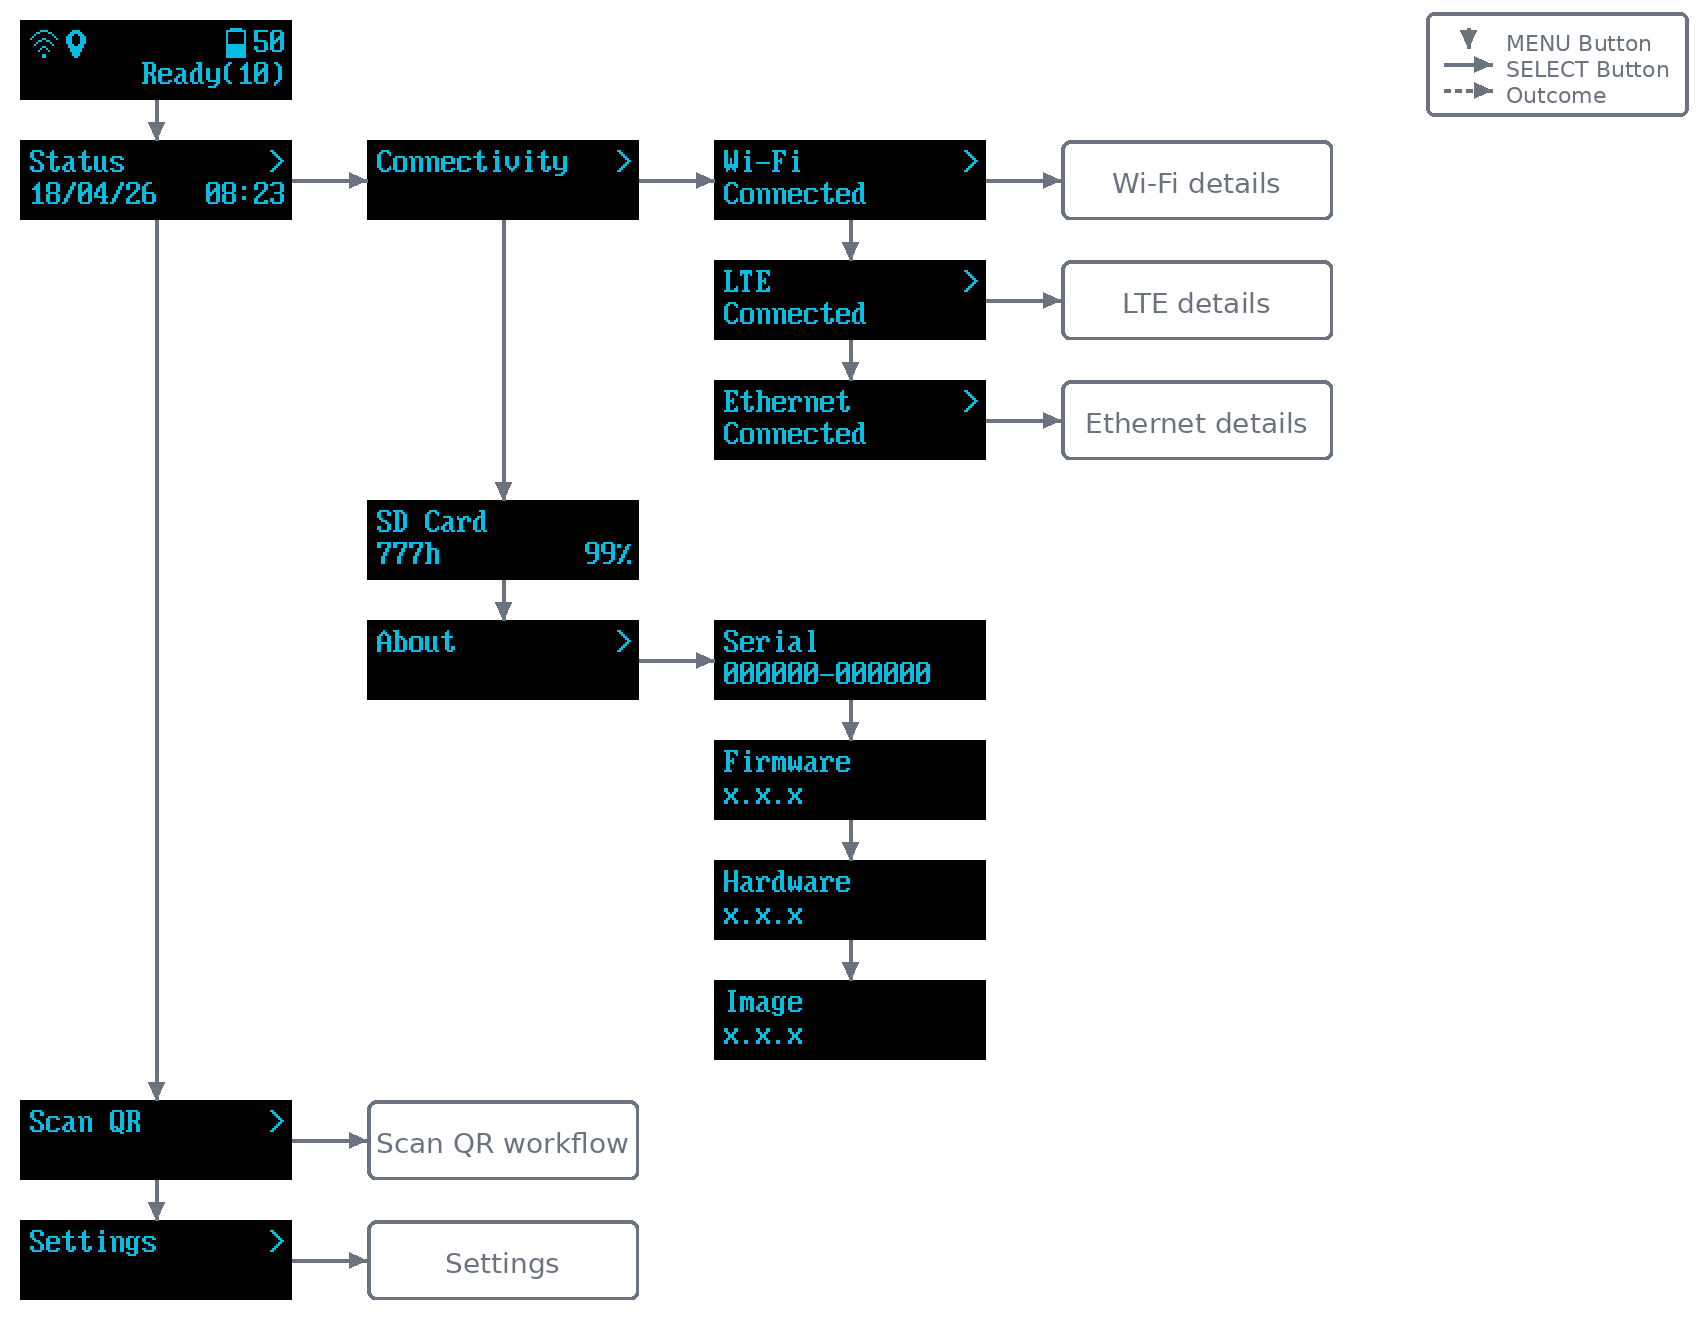
Connectivity
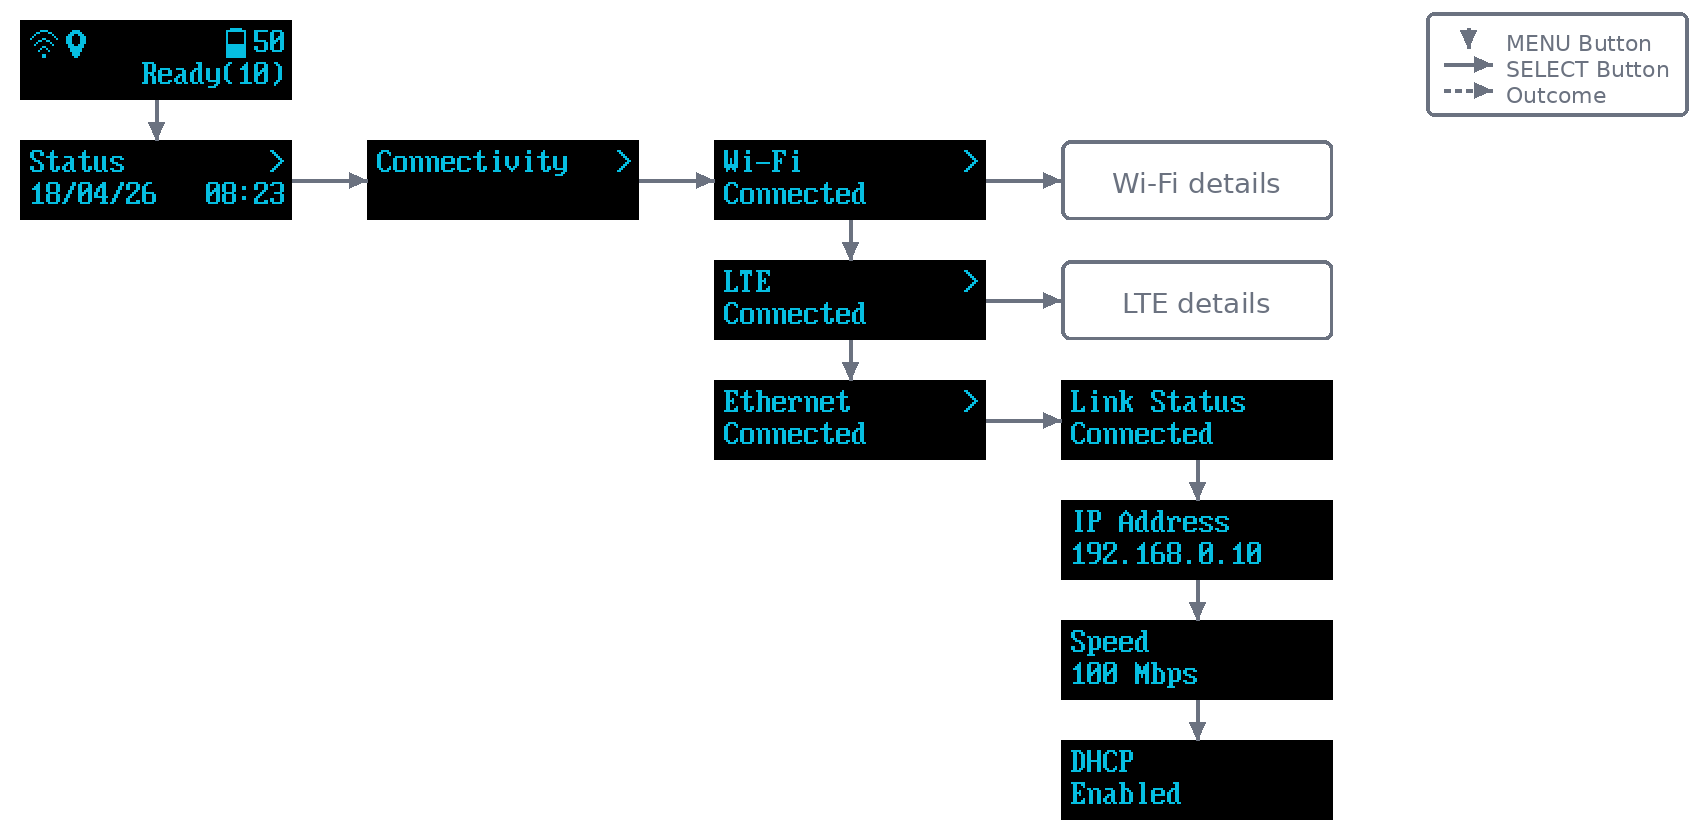
The Connectivity menu groups the network-related pages used to review interface status and connection details for Wi-Fi, LTE, and Ethernet.
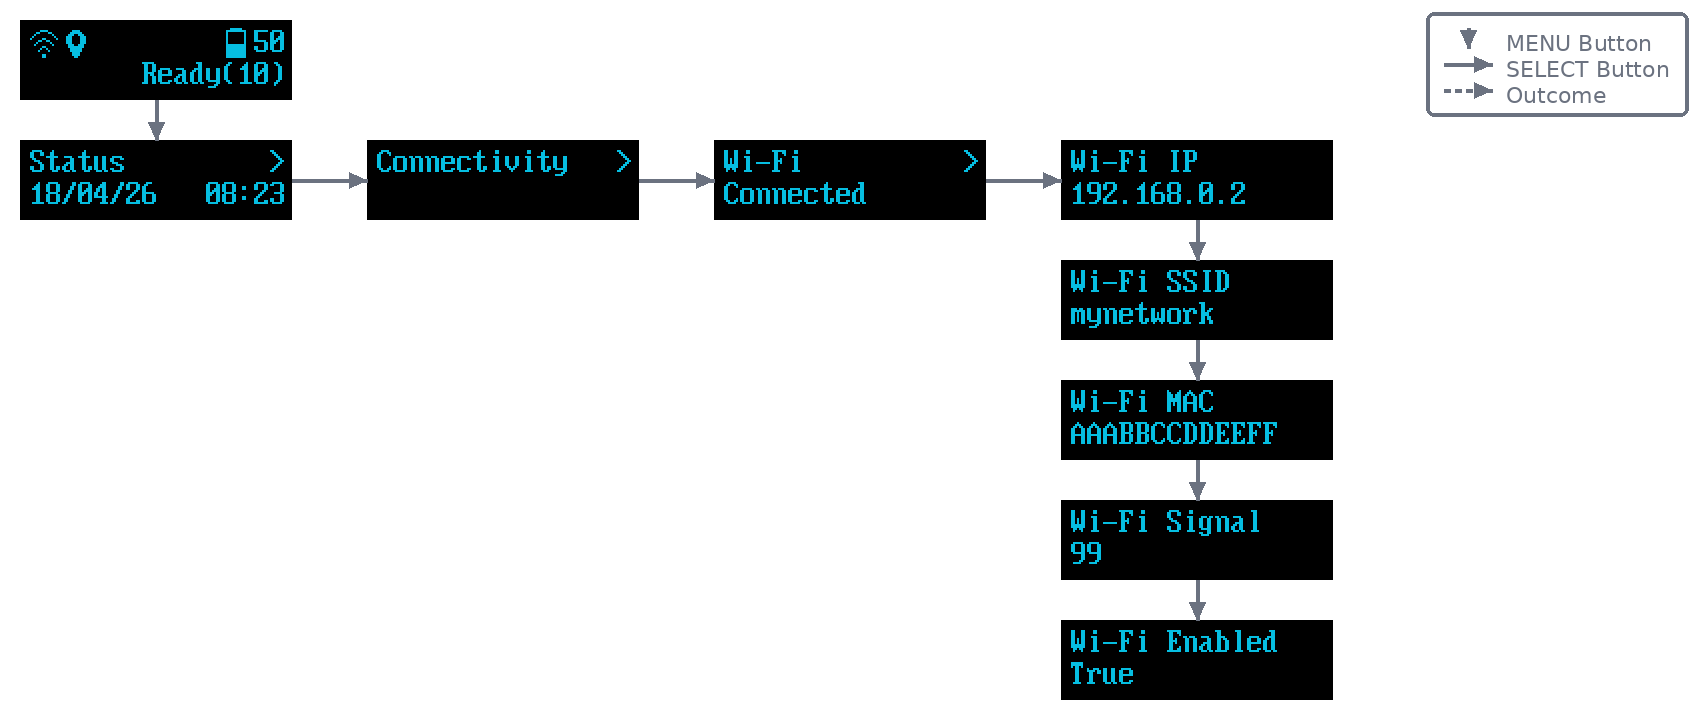
Wi-Fi Details
The Wi-Fi submenu includes pages for IP address, SSID, MAC address, signal strength, and Wi-Fi enabled state.
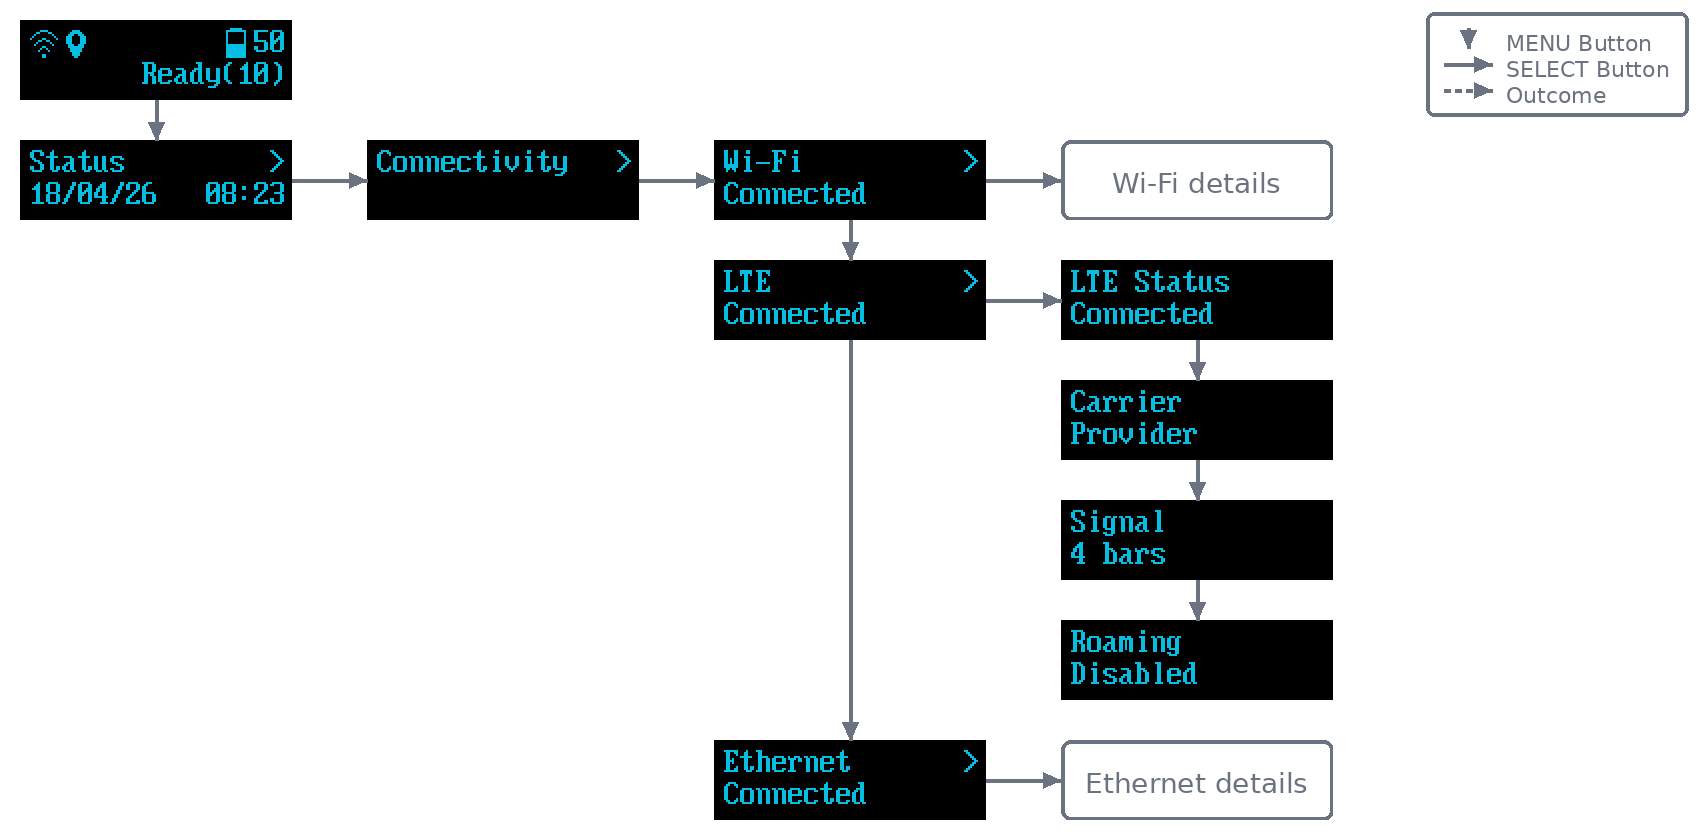
LTE Details
The LTE submenu includes pages for connection state, signal quality, carrier details, and other modem-specific values exposed by the device.
Ethernet Details
The Ethernet submenu includes pages for link state, address information, and status values shown while the camera is docked or connected through Ethernet.
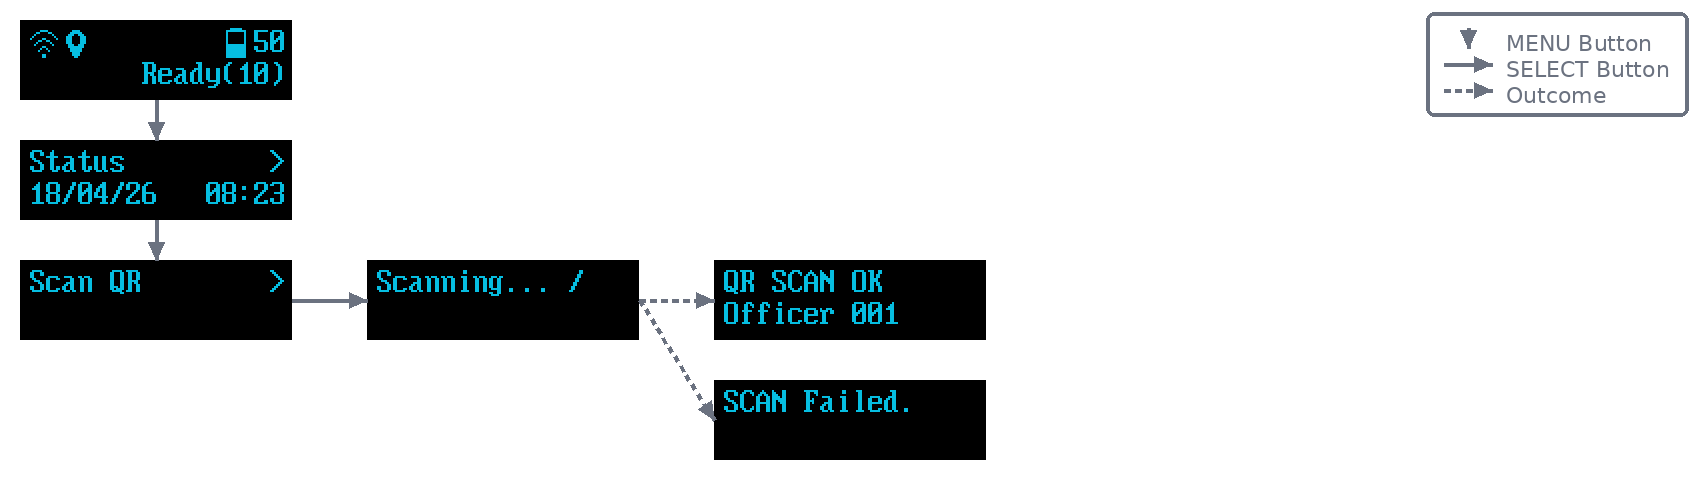
Scan QR Workflow
The following flow shows where Scan QR sits in the menu and which display states appear during scanning. For the full setup procedure, see Initial configuration.
Settings
The Settings menu controls device feedback seen by the wearer and by people facing the camera.
| Setting | Description |
|---|---|
| Speaker Level | Adjusts the speaker volume used by the camera for audible feedback. |
| Display | Adjusts the display brightness. Use Low to dim the display or High for maximum readability. |
| Front LED Level | Adjusts the brightness of the front status LED, which is the LED visible to someone standing in front of the person wearing the camera. |
| Top LED Level | Adjusts the brightness of the top LED, which is typically used as a status indication for the wearer. |
| LED Brightness Range | Both LED level settings can be adjusted from 0 to 5, where 0 turns the LED off and 5 is the maximum brightness. |