Initial Setup
Power-Up
Before powering on the camera, ensure the battery is sufficiently charged.
Note
If the battery charge is too low, the camera displays Low Battery. In this state, the camera must be connected to a charger before it can be used. For charging methods and precautions, see Charging.
- Press and hold the Power button for about 3 seconds.
- Wait for the camera to boot. Startup can take up to 90 seconds.
- Once boot is complete, the status page appears on the display.
Tip
If no action is performed for a few seconds, the display turns off. Press MENU to display the status page again.
Initial Configuration
On a new camera, or after a factory reset, the display shows Setup Required. The camera must be configured by scanning a QR code from the IONODES QR Code Generator by following these steps:
- Open: IONODES QR Code Generator
- Select Initial camera setup.
- Fill in the minimum required values:
- Wi-Fi network name (SSID)
- Wi-Fi password
- Administrator password
- Generate the QR code.
Then scan the QR code with the camera:
- On the camera, press MENU three times to open Scan QR.
- Press SELECT to start scanning.
Scanning...appears on the display.
Tip
Hold the camera close to the QR code, then slowly move back. Optimal distance varies based on the display size used for the QR code (about 15 cm on a smartphone to 50 cm on a desktop monitor).
If the code is not read immediately, rock gently forward and backward until the camera captures it.
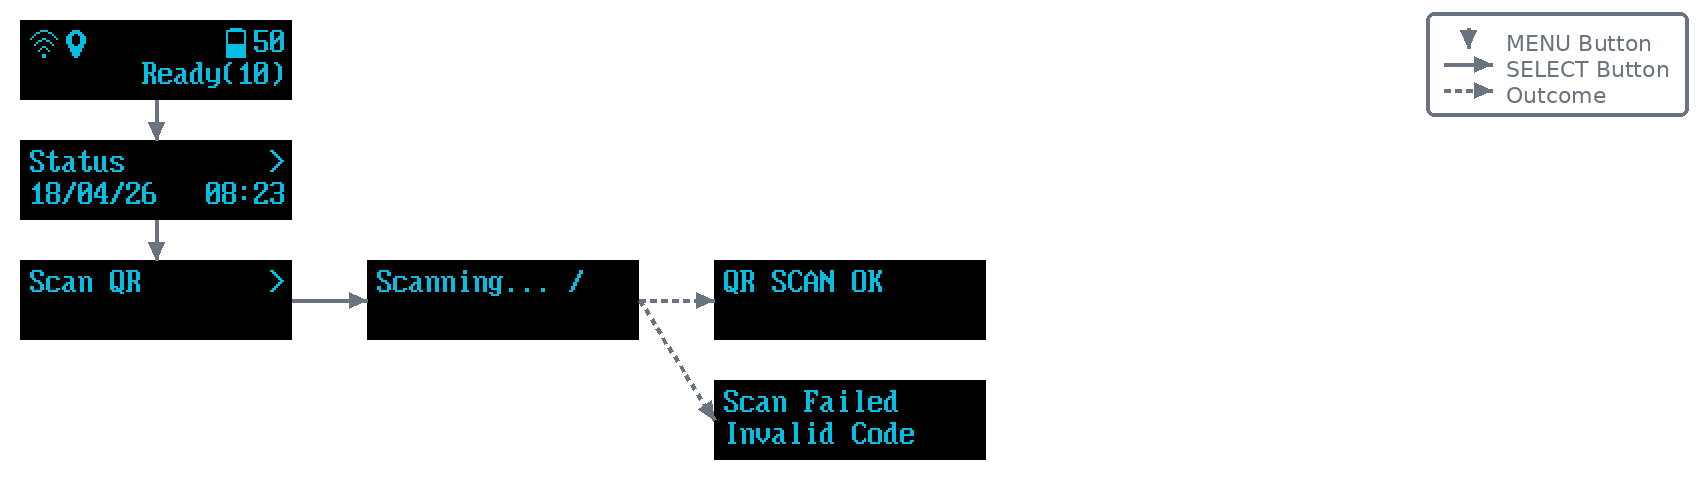
- On success,
Scan OKis shown and the camera confirms with haptic feedback. - If
Scan Failedis shown, the QR code content is invalid (not a valid IONODES setup QR code). Generate a new QR code from the IONODES QR Code Generator and scan again. - After a valid initial setup QR code is applied, the administrator account is configured and the camera attempts to connect to the configured Wi-Fi network.
Admin Account Setup
In a standard initial setup flow, this section is not required. The administrator account is configured during the previous QR code step.
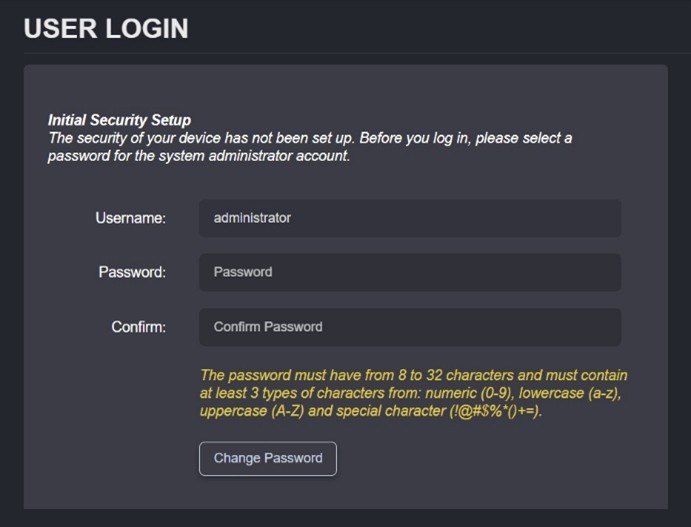
Manual administrator account setup is only required if the device is already connected to Wi-Fi and the administrator password was reset after setup while network settings were retained.
In that case, after Wi-Fi connects, retrieve the camera IP address: press MENU → MENU → SELECT → SELECT → SELECT.

Open a browser and go to http://[IP] (example: http://192.168.0.2).
Note
If HTTPS is used, the browser warns about an unsafe site. This is expected on a local IP using a self-signed certificate.
When prompted for credentials, create an administrator password 8–32 characters long with at least 3 of 4 types: numeric, lowercase, uppercase, special (!@#$%*()+=).