Verifyfaces
This guide describes how to enable the Verifyfaces integration on a PERCEPT Gateway Solution, wait for initialization, and retrieve the Verifyfaces Device ID (FMU ID) for registration in Verifyfaces.
Complete the shared setup linked under Prerequisites before starting this procedure. Refer to Verifyfaces documentation for platform account setup and analytics configuration.
Note
Screenshots are provided as examples. The interface and available options may vary depending on the gateway firmware and Verifyfaces platform version.
Prerequisites
This workflow assumes the following setup is complete:
- Set up the PERCEPT Cloud account and organization using the PERCEPT Cloud user guide.
- Install and configure the gateway using the applicable manual under User Manuals.
- Onboard the gateway using the PERCEPT Cloud integration guide.
Also ensure the following requirements are met:
- Access to the gateway web interface with an administrator account
- A stable internet connection on the gateway, preferably non-LTE for initial setup
- Verifyfaces account registration and licensing completed, with access to the platform
- Familiarity with the gateway web interface and the Verifyfaces platform
Integration overview
The Verifyfaces integration runs as an embedded virtualized service on the gateway. When enabled, the gateway automatically:
- Starts the Verifyfaces virtual machine (VM)
- Downloads and applies Verifyfaces components and updates
- Generates a unique Verifyfaces Device ID, also referred to as the FMU ID
Enable the integration
Complete this procedure in the gateway web interface:
- Log in using an administrator account.
- Open Configuration and select the Integrations tab.
- Expand Verifyfaces.
- Select Enable Verifyfaces Extension.
- Save or apply the configuration change.
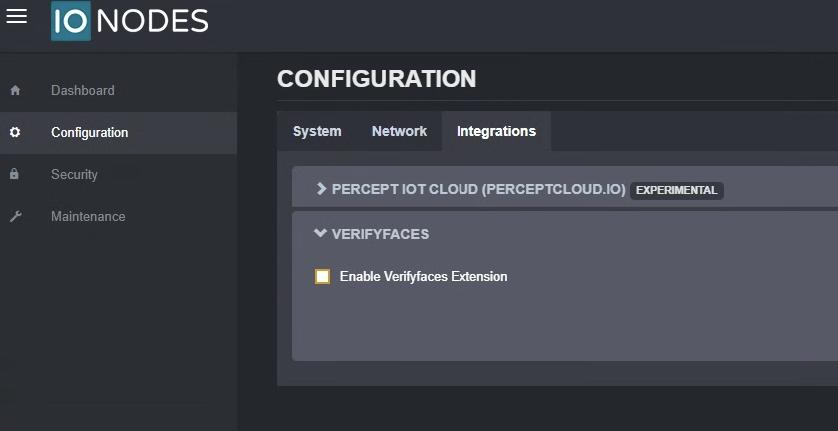
The gateway begins initializing the Verifyfaces environment automatically.
Wait for initialization
The Verifyfaces VM starts automatically, and the gateway downloads the required components and updates. Initialization time depends on network conditions and available system resources.
Warning
Initial downloads can total several gigabytes. A non-LTE internet connection is recommended for initial setup.
Memory usage increases while the Verifyfaces VM is running.
Retrieve the Device ID (FMU ID)
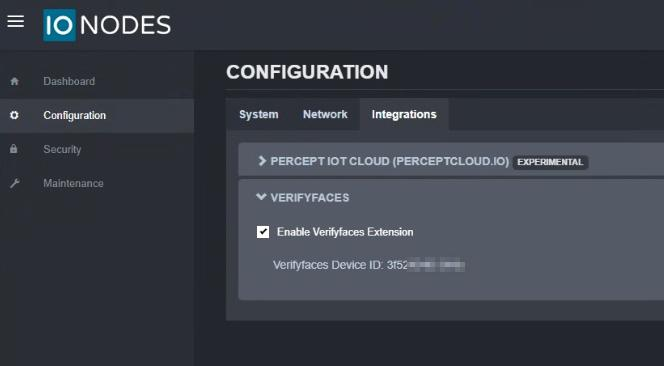
After initialization and updates are complete, the Verifyfaces Device ID appears under Configuration > Integrations > Verifyfaces in the gateway web interface.
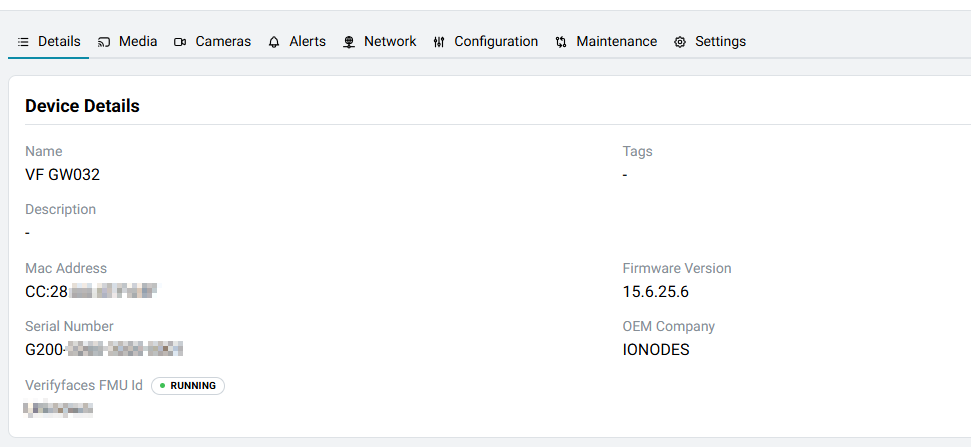
In PERCEPT Cloud, the same identifier also appears as Verifyfaces FMU Id on the device's Details tab.
Validate and complete registration
Once the Device ID is visible:
- Confirm that the gateway displays a Verifyfaces Device ID.
- Confirm that the ID matches the Verifyfaces FMU Id shown in PERCEPT Cloud.
- Complete any remaining registration steps in the Verifyfaces platform using the FMU ID.
- Follow Verifyfaces documentation for analytics configuration and usage.