Network
By factory default, the ION-R150 is configured in DHCP mode (Dynamic Host Configuration Protocol). In DHCP mode, when the device boots up, if it is connected to a network, it scans that network for a DHCP server. If a DHCP server is found on the network, the device requests that the DHCP server provides a unique network address and associated settings. The device then uses the DHCP-provided network configuration to communicate with other computers and cameras on the network.
If no DHCP server is found on the network, the device switches to APIPA mode (Automatic Private IP Addressing). In this mode, the device automatically assigns itself a unique network address in the range 169.254.0.1 to 169.254.255.254 with subnet mask 255.255.0.0. APIPA mode ensures that devices in the APIPA network address range can communicate with one another.
If computers and cameras on the network are not configured in APIPA mode, the ION-R150 will not be able to communicate with them while in APIPA mode. In such a case, the network configuration of the ION-R150 must be set manually.
When the network configuration is set manually, the ION-R150 skips all the steps above and always uses the user-provided configuration. It is then the responsibility of the user to ensure that the network configuration of the ION-R150 is compatible with the computers and cameras on the network.
Local Area Network
After completing initial setup and first login as administrator, continue with network configuration as follows.
On the left side, select Configuration. The configuration interface is then displayed on the right side. Select the Network tab to display the network configuration.
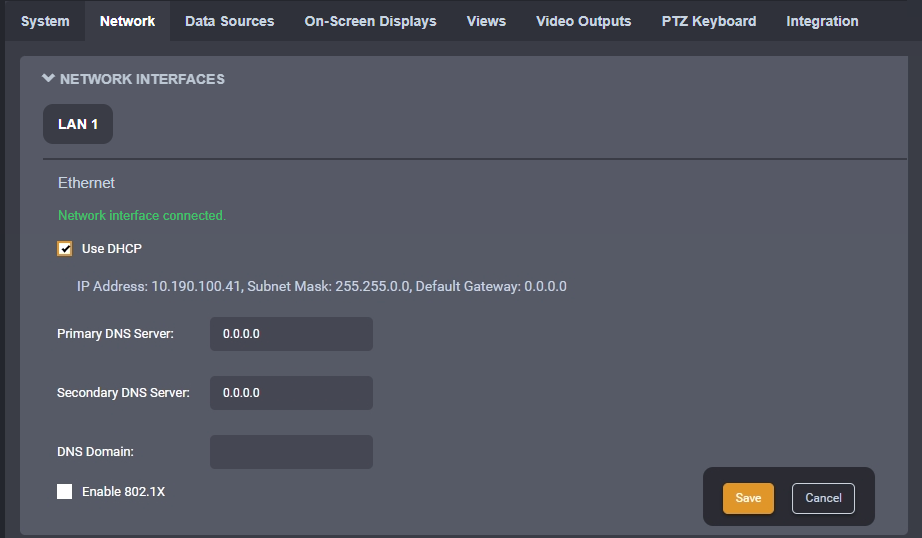
The built-in Ethernet network configuration is shown in the first section Network Interfaces under the LAN 1 button. The first information displayed is the connection status of the Ethernet cable. If the configuration reports the network interface as not connected, check the Ethernet cable between the ION-R150 and the network before proceeding.
By default, the ION-R150 is configured in DHCP mode. To set the network configuration manually, uncheck Use DHCP. Enter each network setting separately. If the required values are unknown, consult the network administrator for settings compatible with the network. At a minimum, a valid IP address and Subnet mask must be entered. Once this is done, click on Save at the bottom to apply the configuration changes.
The ION-R150 supports 802.1x in EAP-PEAP mode. To enable this security feature, check the Enable 802.1x box then enter the required information shown below.
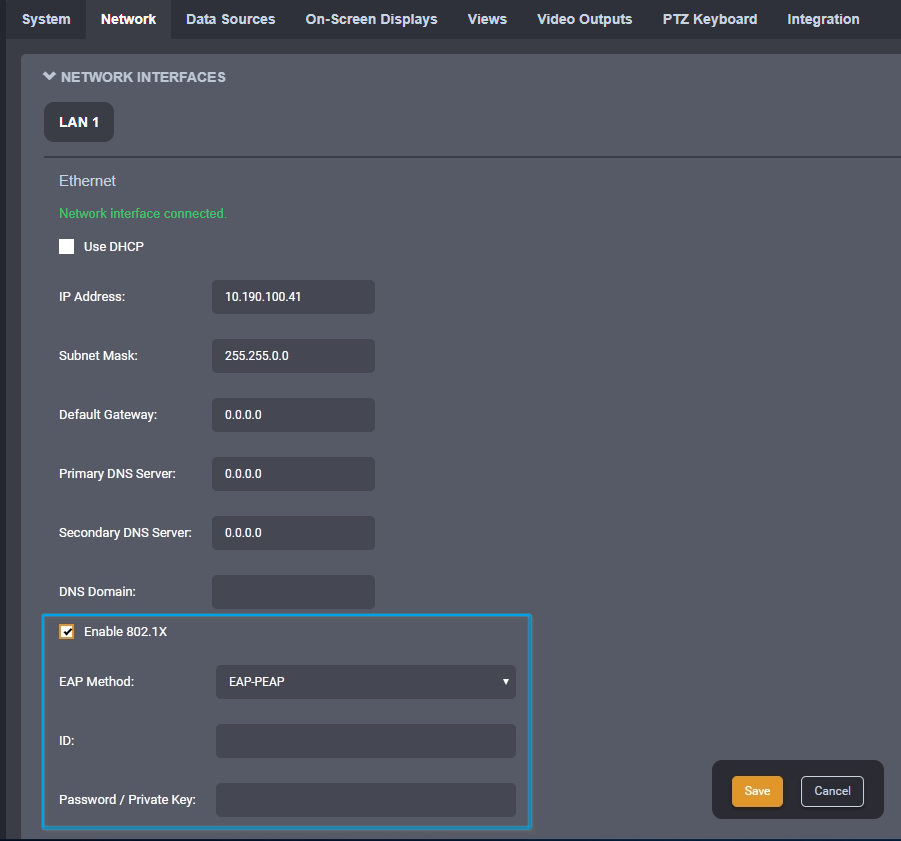
ID: Enter the username in 802.1x ID field for authentication
Password / Private Key: Enter the password in 802.1x Password field for authentication.
Click Save
The device is now ready to communicate with computers and cameras on the network.
USB-to-Ethernet Adapter
The ION-R150 supports an optional USB-to-Ethernet adapter for an additional wired network connection. Other adapters may work, but only IONODES-provided adapters are officially supported.
- Connect the adapter to a general-purpose USB port on the ION-R150, then connect its Ethernet cable to the network.
- Open Configuration > Network.
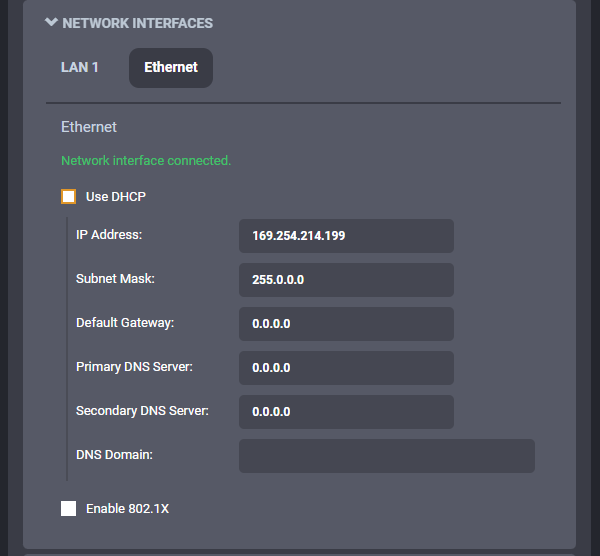
- In Network Interfaces, select the new Ethernet interface that appears when the adapter is connected. The adapter is plug-and-play.
- Configure its IP settings using the same options as the built-in LAN 1 interface. See Local Area Network.
- Click Save to apply the configuration.
Note
The optional IONODES-supplied adapter is a USB 3.0 to 1000 Mbps Ethernet adapter. When connected to a USB 2.0 port, it negotiates a 1000 Mbps link, but actual throughput is in the 200-300 Mbps range.
Note
If the adapter is disconnected and later reconnected, its previous settings are retained unless the ION-R150 is reset to factory settings.