PTZ Keyboard
The ION-R300 can be operated remotely over the LAN with a network keyboard (with or without an optional joystick).
To get started, select the keyboard type and enter the keyboard IP address. If configured correctly, connection typically occurs within a few seconds. The ION-R300 web interface shows the current connection state, and the same state is also reported on the keyboard built-in status screen.
Note
Refer to the keyboard user manual for detailed instructions on configuring its IP address and the IP address of the remote device it connects to. Enabling DHCP on the remote device (for example, the ION-R300) can cause connectivity issues if the IP address changes after a reboot or Ethernet reconnection.
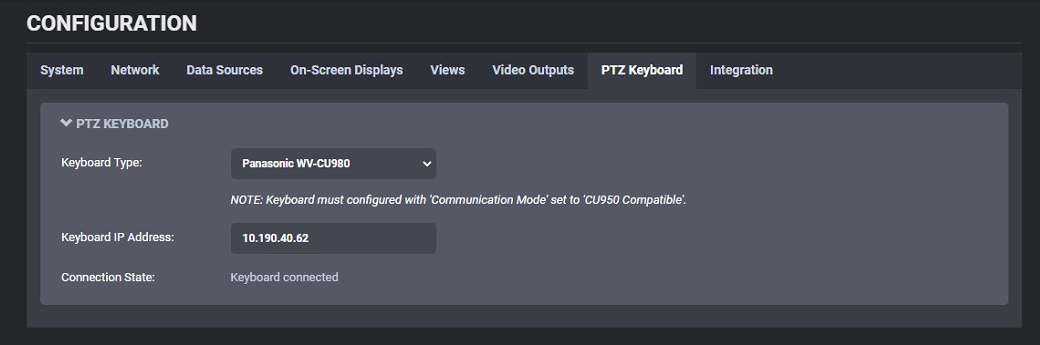
The network keyboard can select a specific tile and assign a data source from the list of available data sources. If an invalid tile or data source is selected, visual feedback is shown on the keyboard built-in status screen.
Command sequence:
- To select a tile, enter the tile number on the PTZ keyboard followed by the MON key. The tile remains selected until another tile is selected or the keyboard disconnects.
- To assign a camera to the selected tile, enter the corresponding data source number followed by CAM.
If a joystick is attached to the keyboard, pan/tilt/zoom functions are available for supported cameras (cameras that expose PTZ via ONVIF). Movement speed and direction follow the keyboard internal settings.
Tile and Display Identification
To identify a display and its tiles for PTZ keyboard operation, use one of the following methods:
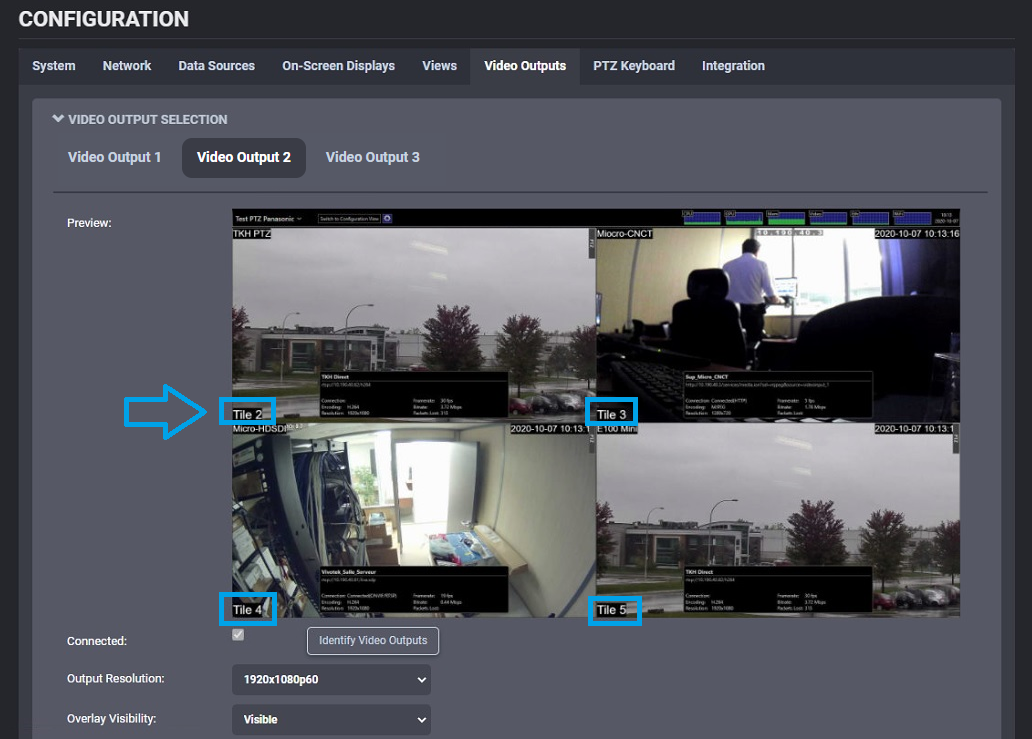
- Use Tiles Identification in Video Outputs. This is the simplest method and adds static on-screen labels that show each tile ID. Use Identify Video Outputs to determine the number assigned to each connected display.
- Configure the dynamic OSD tile identification described below. This advanced method provides additional control over the identifier, including its placement, size, color, and other OSD settings.
Static Tile Identification
In Configuration > Video Outputs, enable Tiles Identification for the required display output. The ION-R300 displays a small static label on each tile showing its ID. For the related display-output settings, see Video Outputs.
Dynamic OSD Tile Identification
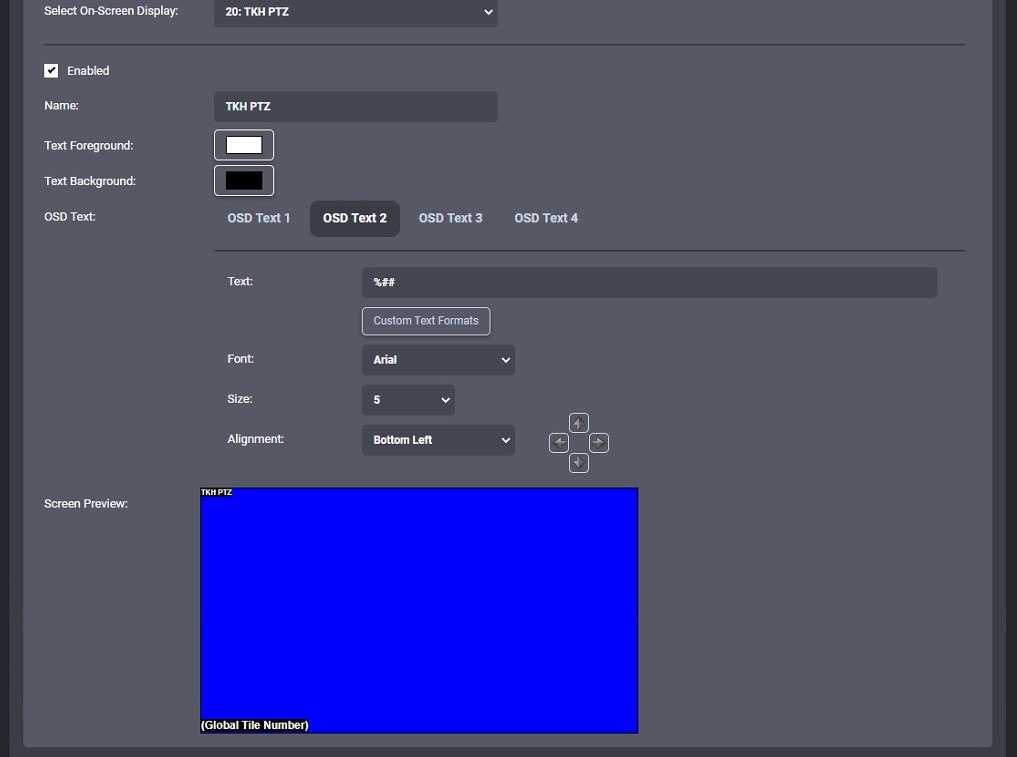
To customize tile identification, use a dedicated dynamic OSD with two custom string options:
%#: Displays the tile number in the format "Tile {OutputNum}-{OutputTileNum}".- Example: Tile 2-16
- Tile numbering starts at 1 for each video output.
%##: Displays the tile number in the format "Tile {GlobalTileNum}".- Example: Tile 32
- Tile numbering does not reset to 1 on each video output. If the layout on video output #1 is 2x2, then the first tile on output #2 is tile 5.
- If the layout on video output #1 changes (for example, 2x2 to 3x3), tile numbering on video outputs #2 and #3 also changes dynamically (the first tile on output #2 moves from 5 to 10).